This topic walks you through creating a policy with AI assistance. Policies are created in the draft stage and can be refined before generating rules and enforcing them.
Before You Start
-
Ensure you have the required permission to access Policy Manager.
-
Understand the policy type you need (Classification, Masking, Retention)
-
Have a clear intent for the policy (what data it governs, why, and how)
For example, the following steps display how to create a data masking policy and configure partial masking for email addresses by masking five characters.
To create business policies, follow these steps:
-
Go to Application Menu > Data Governance > Policy Manager.
The Policy Manager page opens.
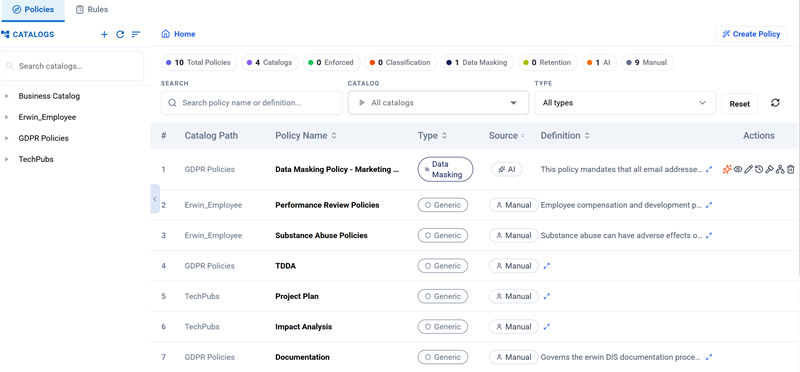
-
On the Policies tab, click Create Policy.
The AI Policy Generator page opens.
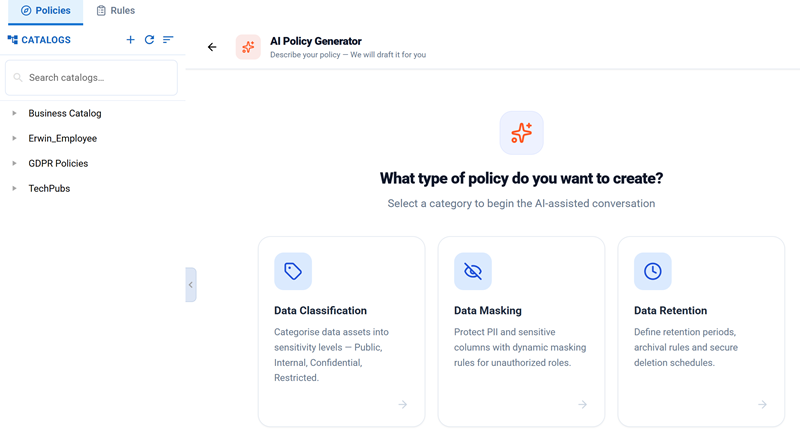
-
Select a policy type:
-
Data Classification
-
Data Masking
-
Data Retention
The AI Policy Generator chat window opens.
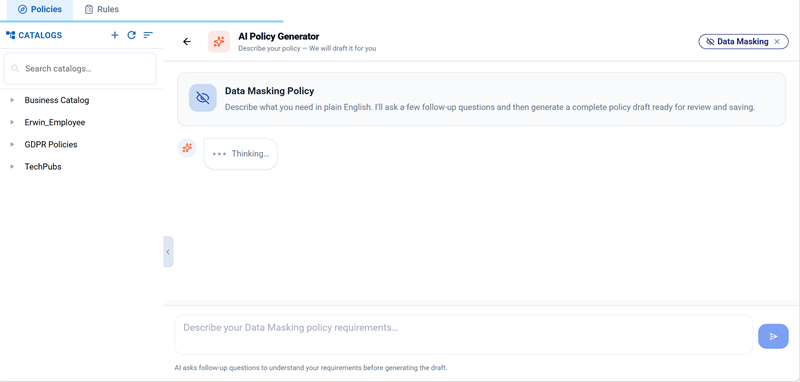
-
-
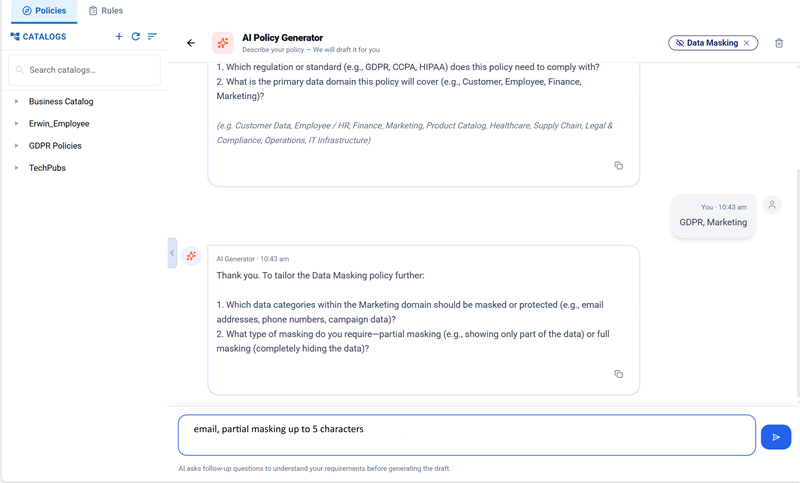
Answer the clarification questions prompted by the AI Policy Generator.
For example:
-
Which regulation or standard must this policy comply with?
-
What is the primary data domain this policy covers?
The AI Policy Generator can ask follow-up questions based on your responses.
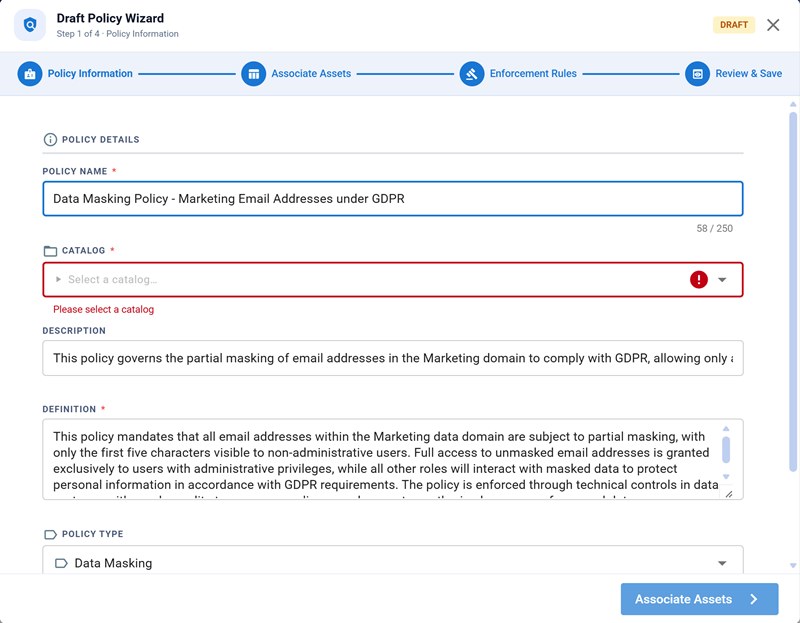
Once all required inputs are provided, the Draft Policy Wizard opens, displaying the first section, Policy Information.
-
-
Review or update the Policy Name.
-
In the catalog field, select the catalog where you want to save the policy.
-
Review the policy description, definition, policy type, and tags.
-
Click Associate Assets.
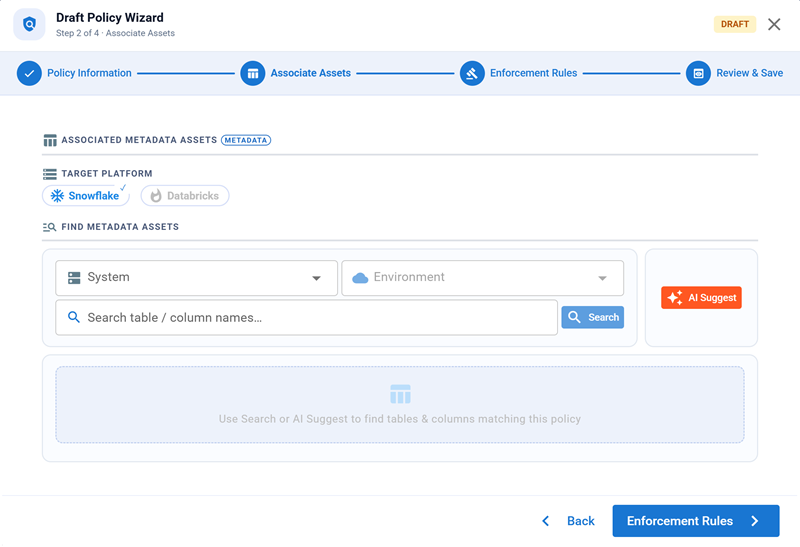
The Associate Assets section opens.
-
Select the system, environment, table, and columns to associate with the policy. You can do one of the following:
-
Select assets manually using drop-down lists or the search box, or
-
Click AI Suggest to view recommended tables and columns.
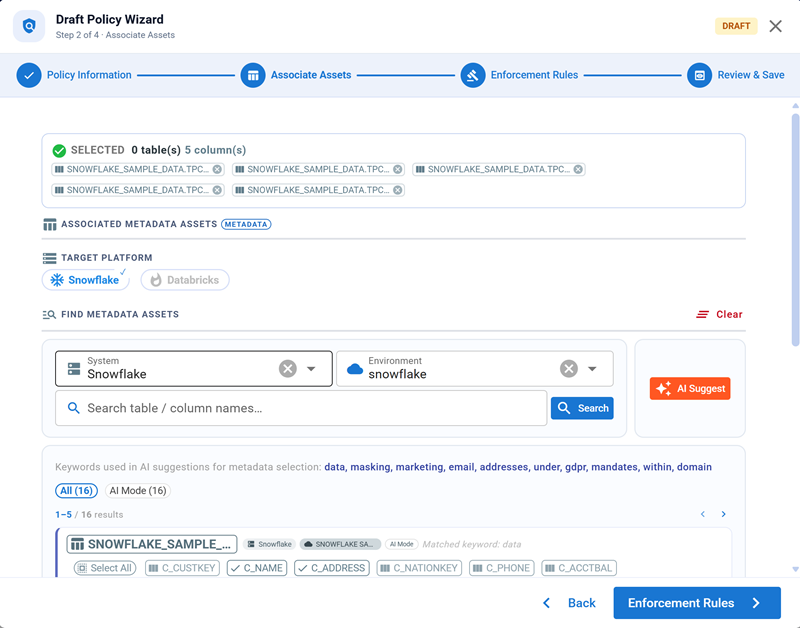
You can review and accept AI‑suggested tables and columns.
Selected assets appear in the Selected field at the top.
-
-
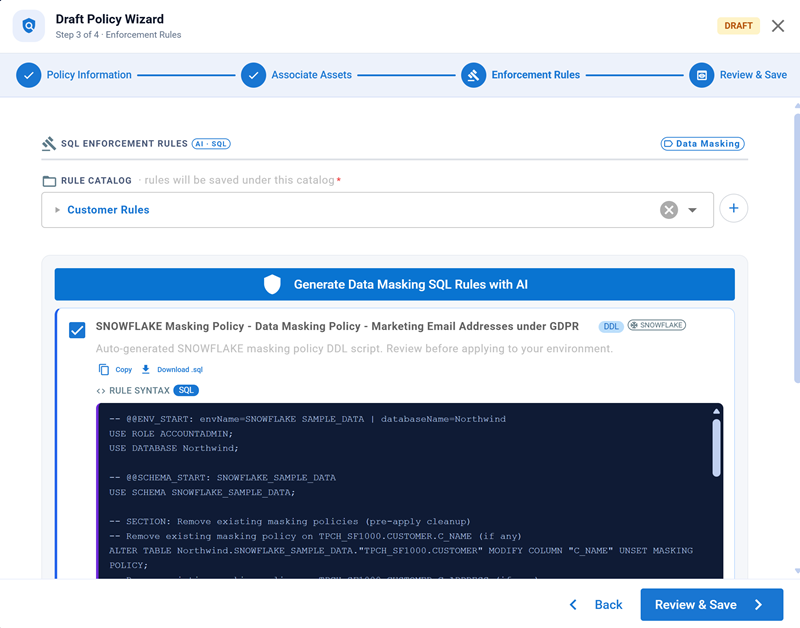
Click Enforcement Rules.
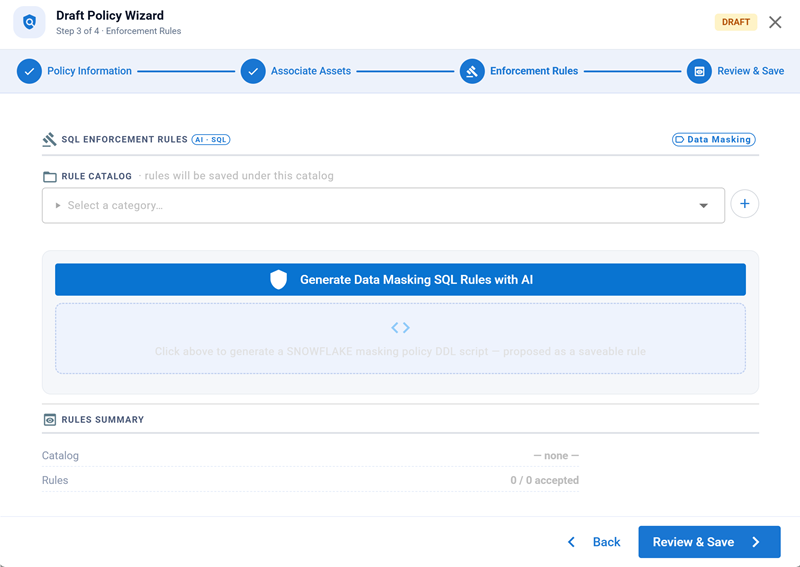
The Enforcement Rules section appears.
-
In the Rule Catalog field, select a rule catalog from the drop-down list. For example, Customer Rules.
-
Click Generate Data Masking SQL Rules with AI.
These are SQL rules used to enforce the policy. The system generates the SQL rules automatically. No manual input is required.
-
(Optional) If you do not want to enforce the policy immediately and want to assess it outside the Quest DI system, click one of the following:
-
Copy
-
Download
-
-
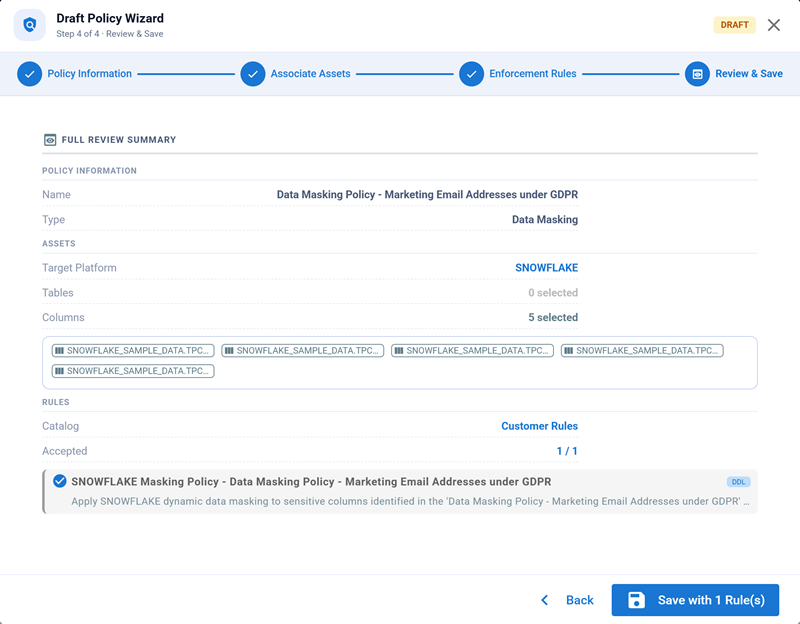
After verification, click Review & Save.
The Review & Save page displays the policy summary.
-
Click Save with n rule(s).
The rules are saved in the Quest DI database, and you return to the Policies tab.
For further workflow, refer to the Managing Policies topic.